
TL;DR
Start with soft, face-facing light and the phone's native camera rather than an extra HDR app. Compare matched shots for facial detail, natural contrast, and clean edges; choose faithful source photos for AI portraits rather than the brightest-looking image.
A brighter selfie isn't automatically a better headshot. Camera app HDR for headshot selfies is most useful when it balances bright surroundings with a clearly exposed face, while keeping facial features natural.
HDR photography: High dynamic range photography captures or processes a wider range of brightness, often combining exposures to preserve detail in highlights and shadows.
For job seekers, freelancers, and business owners, the goal is a recognizable portrait that works at profile-picture size. Clear source photos also provide a useful starting point for AI portrait workflows such as Looktara. The practical starting point in 2026 remains simple: improve the light first, then evaluate the camera's processing.
Table of Contents
What does HDR do for headshot selfies?
HDR for headshot selfies balances bright and dark areas so a face can remain readable beside a bright background. Depending on the camera, processing may combine frames or adjust tones automatically. Its value comes from preserving useful facial detail, not from making every part of the photograph equally bright.
Capture HDR, display HDR, and portrait blur
Camera menus can use similar language for different functions. These distinctions make settings easier to judge:
- Capture HDR: Processing intended to retain detail across a scene's brightness range.
- Display HDR: A way of showing a wider brightness range on compatible screens; it isn't the same as capturing a better face.
- Portrait mode: Background-blur processing that separates a subject from the surroundings.
- Beauty processing: Appearance adjustments, such as skin smoothing, that should be evaluated separately from exposure.
A headshot can use HDR without artificial background blur. Likewise, a blurred background doesn't prove that the camera preserved accurate skin texture.
Native camera versus a dedicated HDR app
The native camera is a sensible baseline because it makes a controlled comparison straightforward. Pixel Camera, Google's camera application for Google Pixel devices, is one example of a device-specific camera rather than a universal Android option.
A separate app becomes worth testing when it offers a needed control, such as exposure adjustment or repeatable capture settings. App labels alone don't establish portrait quality.
Choose the camera by the resulting face, not by the strength of its HDR branding.
When should HDR be used for a selfie headshot?
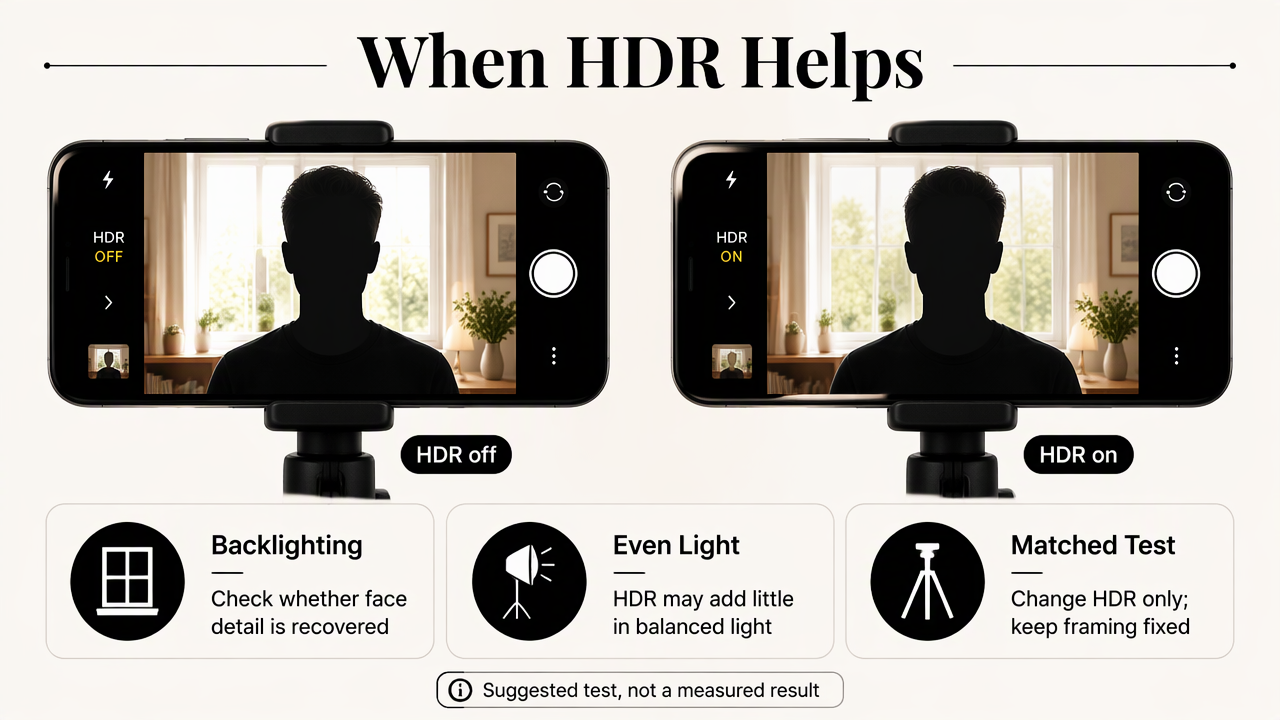
HDR should be used for a selfie headshot when the scene contains a meaningful brightness difference, such as a face near a bright window. In already soft, even light, its benefit may be modest. A matched comparison helps separate genuinely recovered detail from processing that merely changes the photograph's appearance.
Three controlled comparisons to run
These are suggested tests, not measured results. Each pair should keep the phone position, expression, background, and lighting unchanged; only the available HDR setting should change.
- Backlighting: Place a bright window behind the subject. Compare whether the face becomes clearer while the window retains detail. Then face the window and repeat; better lighting may make the setting less important.
- Facial contrast: Stand beside a window so one cheek receives more light. Compare whether the darker cheek gains detail while the nose and cheekbones retain their natural shape.
- Hairline halos: Use a bright background behind dark hair. Inspect the hair, ears, and shoulders for bright outlines or doubled edges before judging overall brightness.
If the camera offers no HDR switch, compare positions relative to the window instead. Automatic processing doesn't prevent a useful lighting test.
HDR decisions for AI portrait source photos
Source-photo selection should favor a clearly recognizable face over dramatic lighting or an attention-grabbing edit.
| Capture condition | HDR decision | Source-photo priority |
|---|---|---|
| Bright window behind the face | Test HDR, then improve positioning | Clear face with natural skin tones |
| Soft window light facing the subject | Keep the default unless comparison helps | Visible eyes and facial contours |
| Strong light on one cheek | Compare processing and soften the light | Detail without flattened facial shape |
| Bright outlines around hair | Change lighting or processing and retake | Clean hairline and shoulder edges |
Check both the full image and a close crop. A photograph can look appealing as a thumbnail while showing processing artifacts around individual features.
How can a phone capture a natural HDR headshot?
A natural HDR headshot starts with controlled lighting and consistent framing:
- Clean the lens and select the native camera.
- Face soft window light against a simple background.
- Support the phone near eye level.
- Compare available HDR settings without changing position.
- Inspect facial detail, then save the most faithful original.
Set lighting and framing before adjusting processing
A large window with indirect light is a practical starting point. Position the subject so the eyes are clear and the brightest area isn't directly behind the head. A plain wall keeps the comparison focused on the face.
Support the phone on a stable surface or stand and use a timer where available. Avoid placing the camera extremely close to the face; adjust distance and crop afterward rather than filling the frame with a close-up.
Keep the head angle and expression consistent across test shots. Otherwise, a flattering expression can be mistaken for an improvement caused by HDR.
Review the face instead of the brightest background
The strongest candidate should preserve the person's identity at both normal viewing size and a closer inspection.
- Eyes: Check focus, readable eyelids, and a natural expression.
- Skin: Look for believable texture and color rather than maximum smoothness.
- Shape: Confirm that cheekbones, jaw, and nose remain distinct.
- Edges: Inspect glasses, hair, ears, and shoulders for unusual outlines.
- Exposure: Favor facial detail over perfectly recovered scenery.
Switch off optional beauty effects during the comparison when controls allow. Keep exposure adjustments modest, and retake in softer light if facial highlights remain featureless.
Prepare a consistent file for the intended platform
Save the original before making crops or edits. Review the intended upload file, not only the camera preview, since its appearance may differ across viewers and displays.
For fitness professionals preparing a career profile, the next step may be a LinkedIn resume headshot workflow. A centered face with space around the head gives more room for platform-specific cropping.
How Looktara handles this
The Looktara platform fits the next stage of the process: creating AI portrait imagery from selected source photos. Camera HDR is a capture decision, while AI portrait generation is a separate workflow. Preparing clear, representative photographs gives that workflow a more useful starting point.
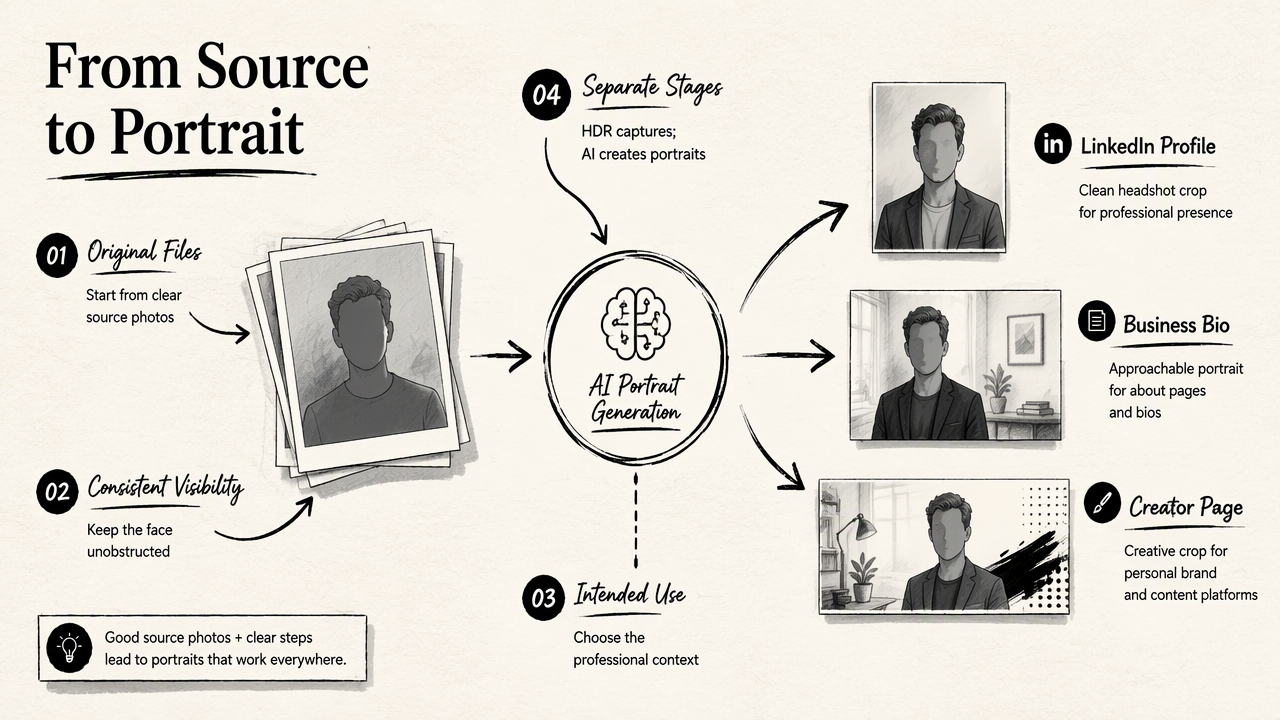
A practical handoff includes original files, consistent facial visibility, and a clear intended use. A LinkedIn profile, business biography, and creator page may need different compositions even when they represent the same person.
Choose source photos around the publishing goal
Source selection should reflect the professional identity the final portrait needs to communicate.
- Job seekers: Prioritize a recognizable expression and a profile-friendly composition.
- Business owners: Select photographs that support a consistent public-facing identity.
- Creators: Match the intended presentation to the publication or channel.
For fitness creators, a newsletter resume headshot workflow offers a relevant next destination. A Pinterest resume headshot workflow may fit a visual publishing plan.
Review the service's current upload instructions before choosing file types or quantities. Requirements should come from the product, not assumptions about HDR.
FAQ: HDR settings and headshot quality
HDR decisions are best made from the lighting conditions and the saved portrait rather than from a universal on-or-off rule.
A recognizable face is the quality standard; extra background detail is secondary.
Should HDR always stay on for LinkedIn headshots?
HDR doesn't need to be forced on for every LinkedIn headshot. In soft, even lighting, the default camera processing may already produce a suitable portrait. Where a toggle exists, compare matched photographs and select the version with clear eyes, natural skin, and defined facial contours. Background brightness alone shouldn't decide the winner.
Why can an HDR selfie look flat or overprocessed?
An HDR selfie can look flat when processing reduces the brightness differences that help describe facial shape. Strong tone adjustments may also emphasize texture or create visible outlines. A practical response is to compare a gentler setting, if available, and improve the light. Increasing beauty smoothing addresses a different issue and isn't a reliable exposure fix.
Is portrait mode the same as HDR?
Portrait mode isn't the same as HDR. Portrait mode generally focuses on separating the subject and blurring the background, while HDR addresses the scene's brightness range. Some cameras apply both together. Evaluate them separately where possible: facial exposure belongs to one comparison, while hair edges and background separation belong to the other.
Should HDR be disabled for AI headshot source photos?
HDR doesn't have to be disabled simply because a photograph will become an AI headshot source. The useful question is whether the saved image faithfully represents the person. Select clear originals with natural facial detail, then follow the service's upload instructions. A well-exposed default-camera photo can be more useful than a heavily edited alternative.
Conclusion
The next step is a controlled three-photo test: soft front lighting, backlighting, and side lighting. Compare facial detail and edges, retain the strongest originals, and choose the intended profile crop. For camera app HDR for headshot selfies, that small test is more useful than chasing a universal setting. Professionals ready for an AI portrait workflow can visit looktara.com and review Looktara's current source-photo requirements before uploading.
Generated by EarlySEO.com